Order Types
Frequently Asked Questions
Section titled “Frequently Asked Questions”What happens if I don’t select a order type?
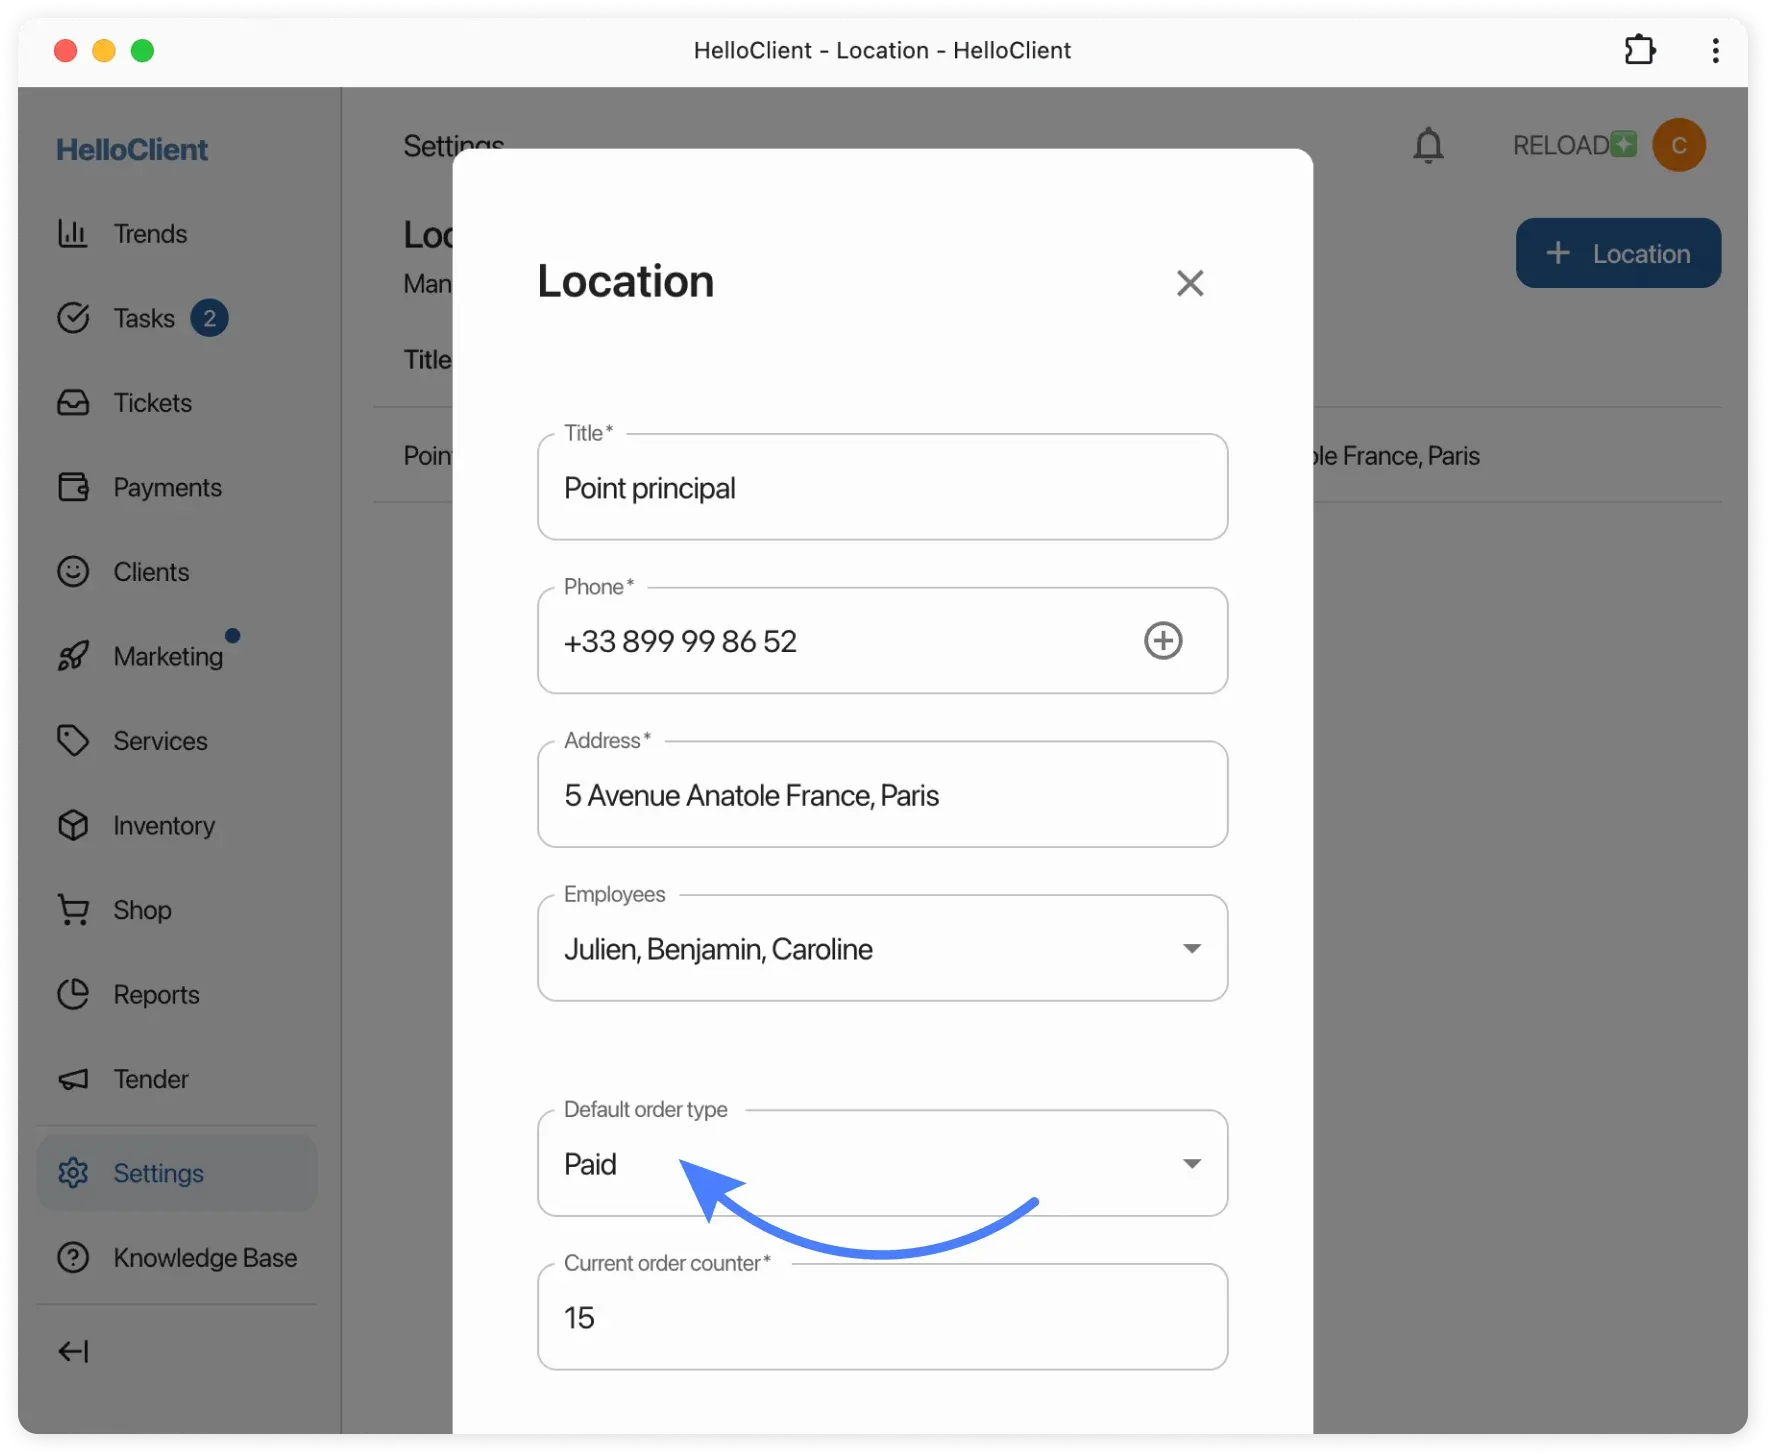
The system will apply the default order type.
You can set or change it in Settings > Locations > Default order type.
Can I configure statuses for different order types?
For each order type, you can only configure the initial status.
The status can only be selected from the “New” group.
To do this:
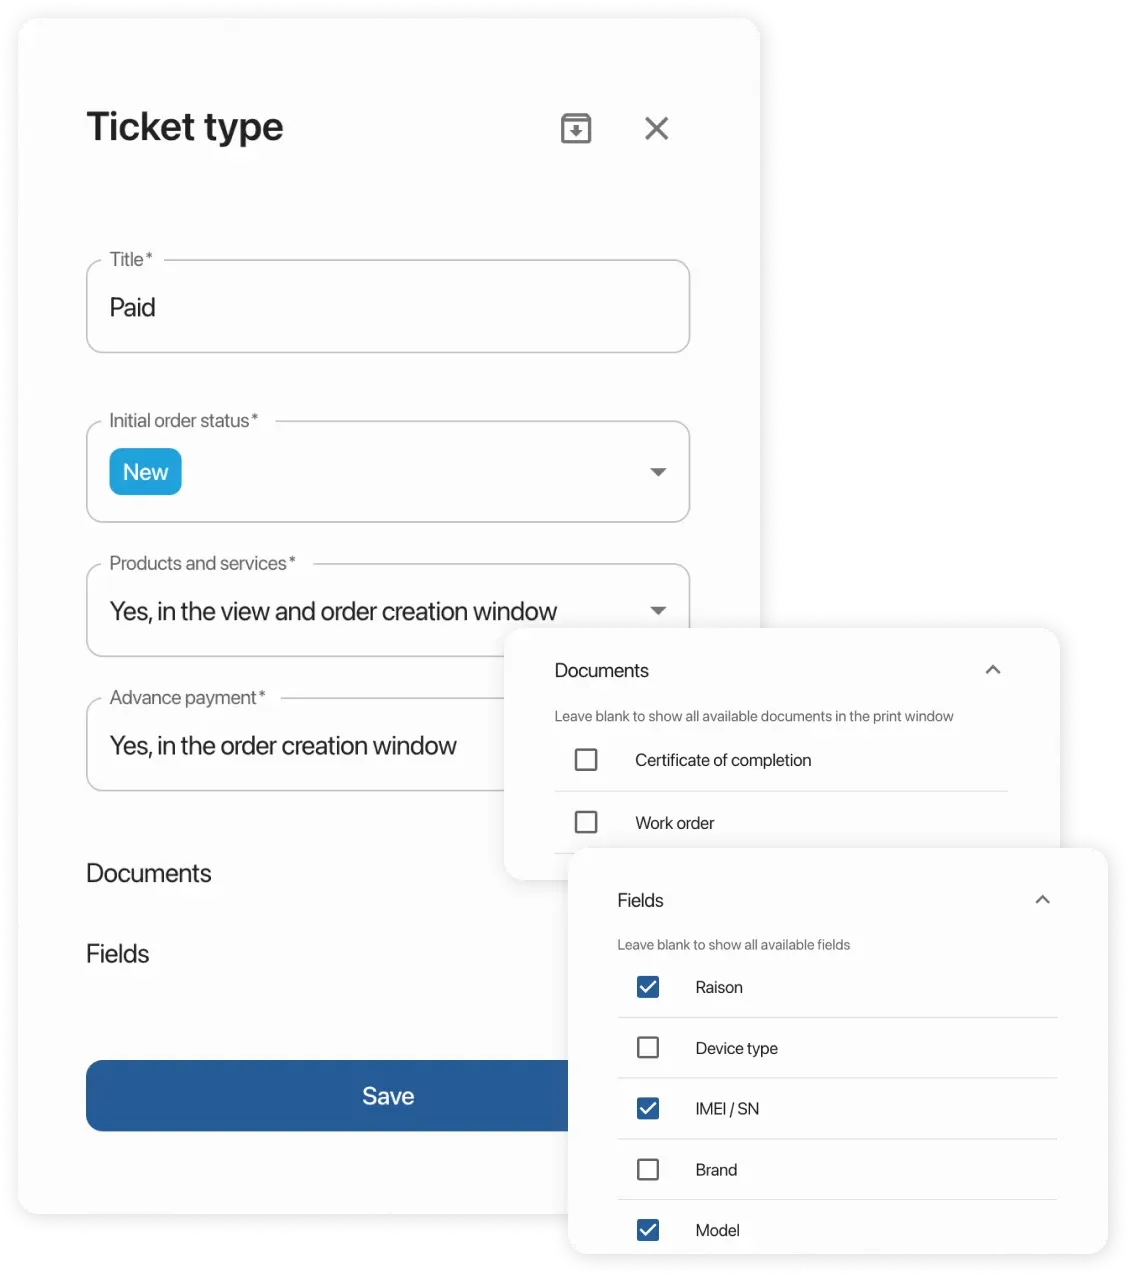
- Go to Settings / Order Types;
- Select a order type and open its card;
- Set the initial order status.
You can also link custom order fields and documents to each order type.
How to change the initial status for a order type?
-
Navigate: Settings → Order Types
-
For each type, set the desired initial status
Restriction: only statuses from the “New” group are available
Dividing orders by type will help better manage orders, reduce processing time, and provide more accurate company analytics.
Features for each order type
Section titled “Features for each order type”You can attach to each order type:
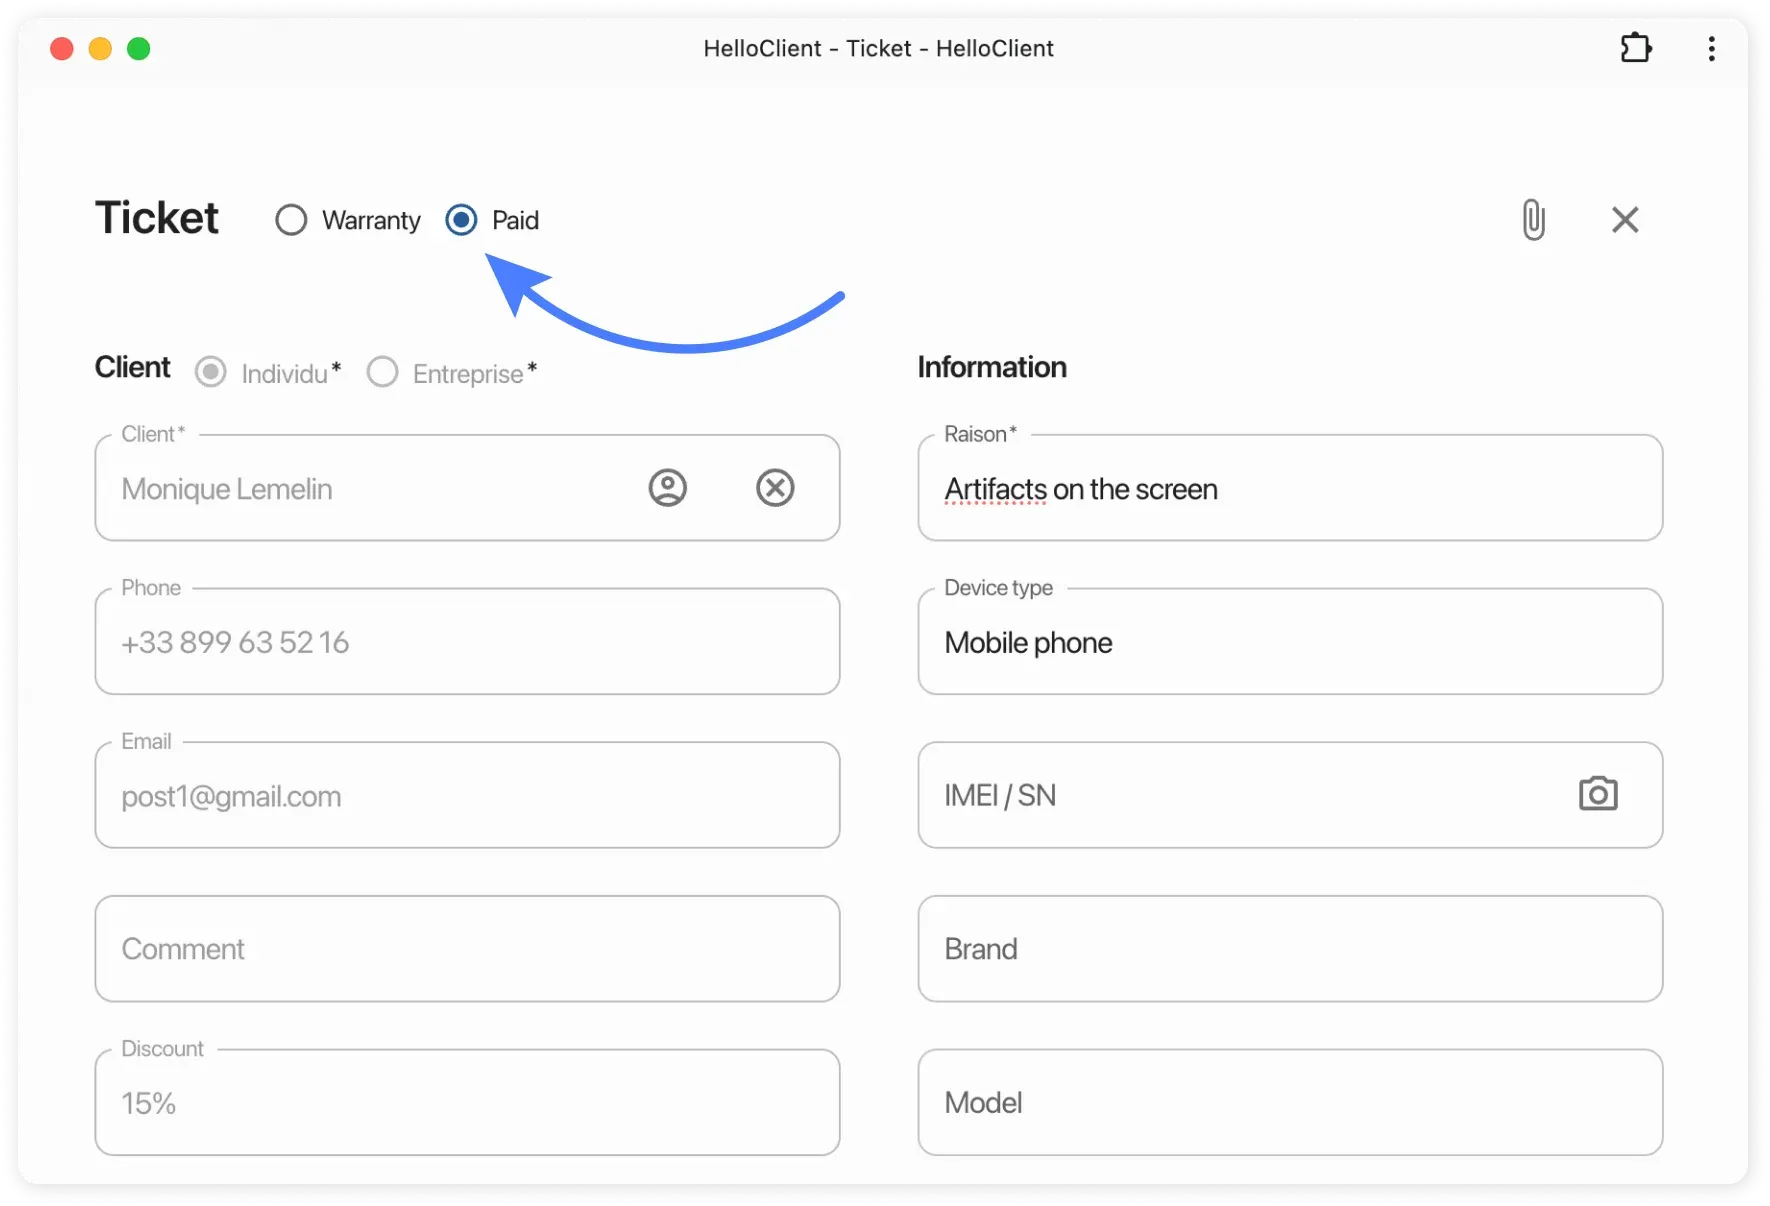
- Custom fields (e.g., “Urgency”, “Delivery method”)
- Unique documents (acts, receipts, reports)
- Initial status (e.g., “Under diagnostics”, “New”)
Order Type Examples
Section titled “Order Type Examples”For service centers:
Section titled “For service centers:”- Paid repair
- Warranty service
- On-site diagnostics
For shoe cleaning:
Section titled “For shoe cleaning:”- Sole repair
- Comprehensive cleaning
For tailoring shops:
Section titled “For tailoring shops:”- Custom clothing
- Express repair
Configuring Fields for Order Types
Section titled “Configuring Fields for Order Types”- Create a new field:
Settings → Order Fields → ”+ Field” - Link the field to a order type:
Settings → Order Types → Select type → Add field

Order Type Configuration Parameters
Section titled “Order Type Configuration Parameters”Configure for each type:
- Name (example: “Express repair”)
- Initial status from “New” status group (e.g., “Accepted for work”)
- Prepayment (can disable the field)
- Add products/services during creation (allow/prohibit)
- Printable templates (select receipts and acts)
- Linked fields (from created list)