Working with Orders
All stages of order creation from request acceptance to closure
Frequently Asked Questions
Section titled “Frequently Asked Questions”How to change order numbering?
- Go to Settings → Locations → Current order counter.
- If you need to start from 1, set the counter to 0.
- Old orders will remain, and new ones will follow the new sequence
How to delete a order?
- Go to the order card → click the delete icon in the top right corner.
How to attach photos to a order?
When creating a order:
- Click the paperclip in the top right corner → select file (max size: 1 MB).
For an existing order:
- Open the order.
- Click the paperclip in the left corner → upload photo.
- The photo will appear in the order comments (left column).
Creating a order
Section titled “Creating a order”-
Go to the “Orders” module
-
Click “Create order” in the bottom right corner
-
Select order type:
- Paid, warranty, etc.
- The order type determines the set of fields to fill. If the needed type is missing, you can add it in order type settings
-
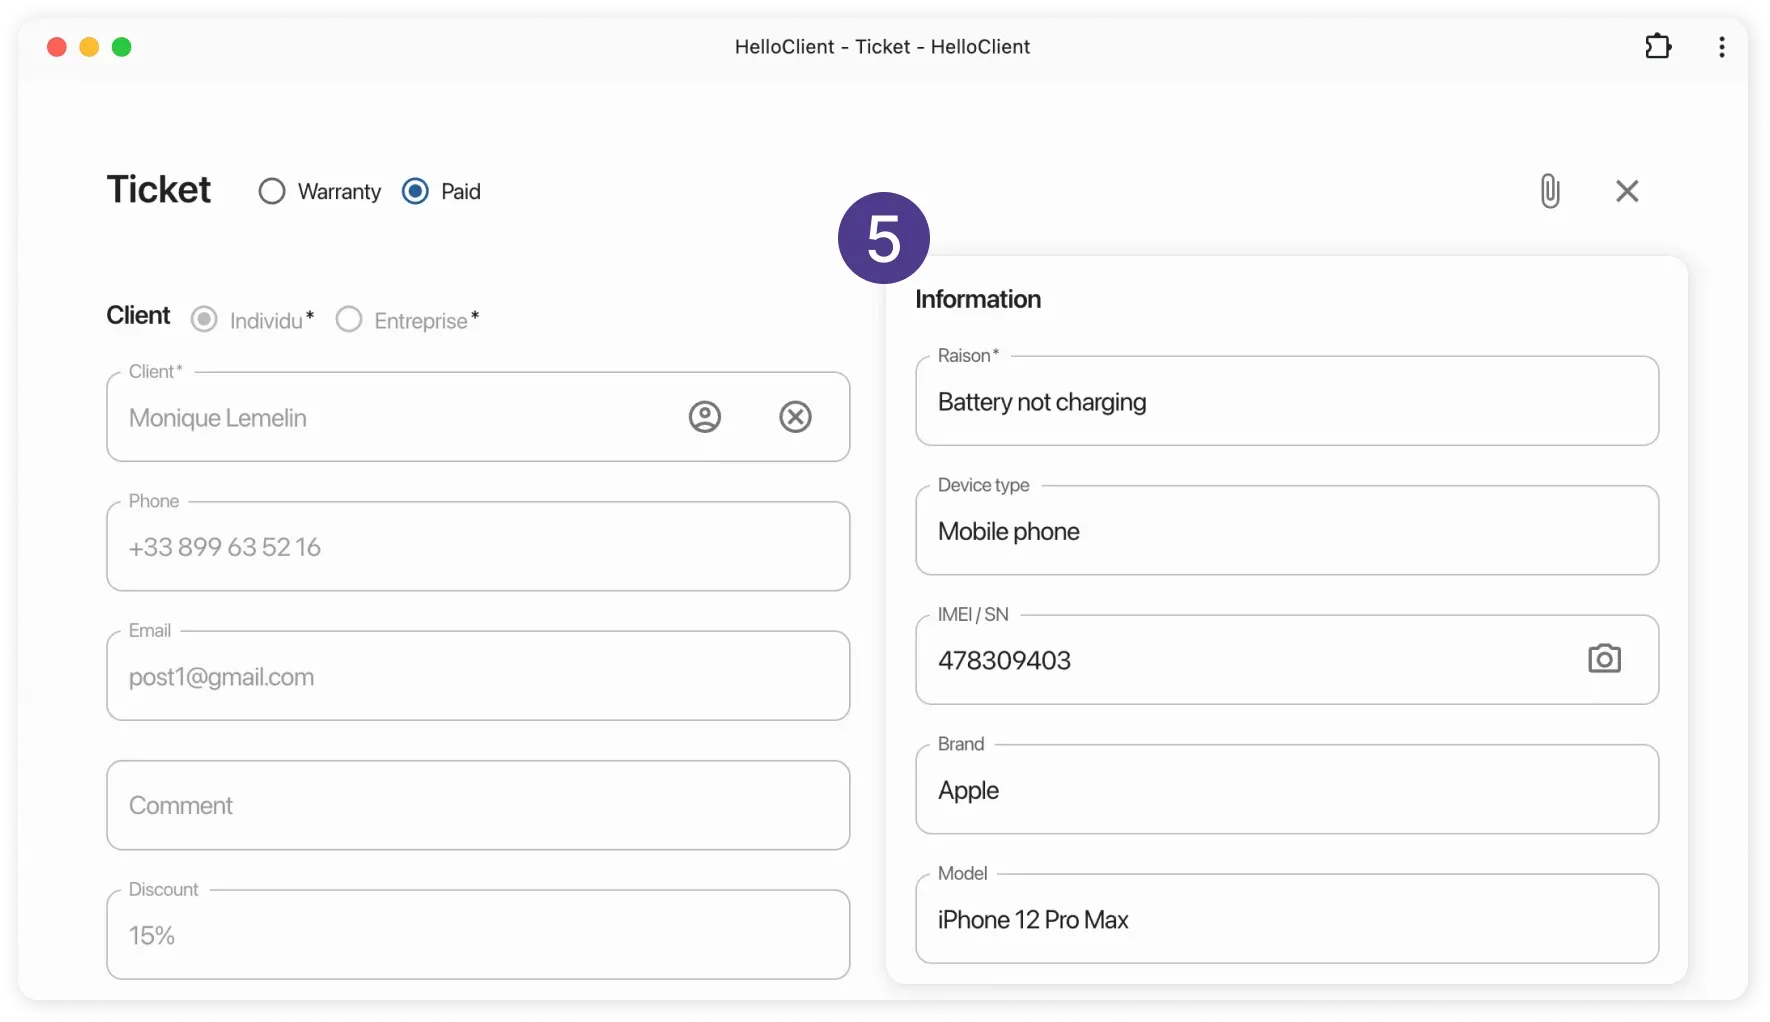
Specify client:
- Select from database or create new
- If you need additional fields for client information, create them in Settings → Client Fields
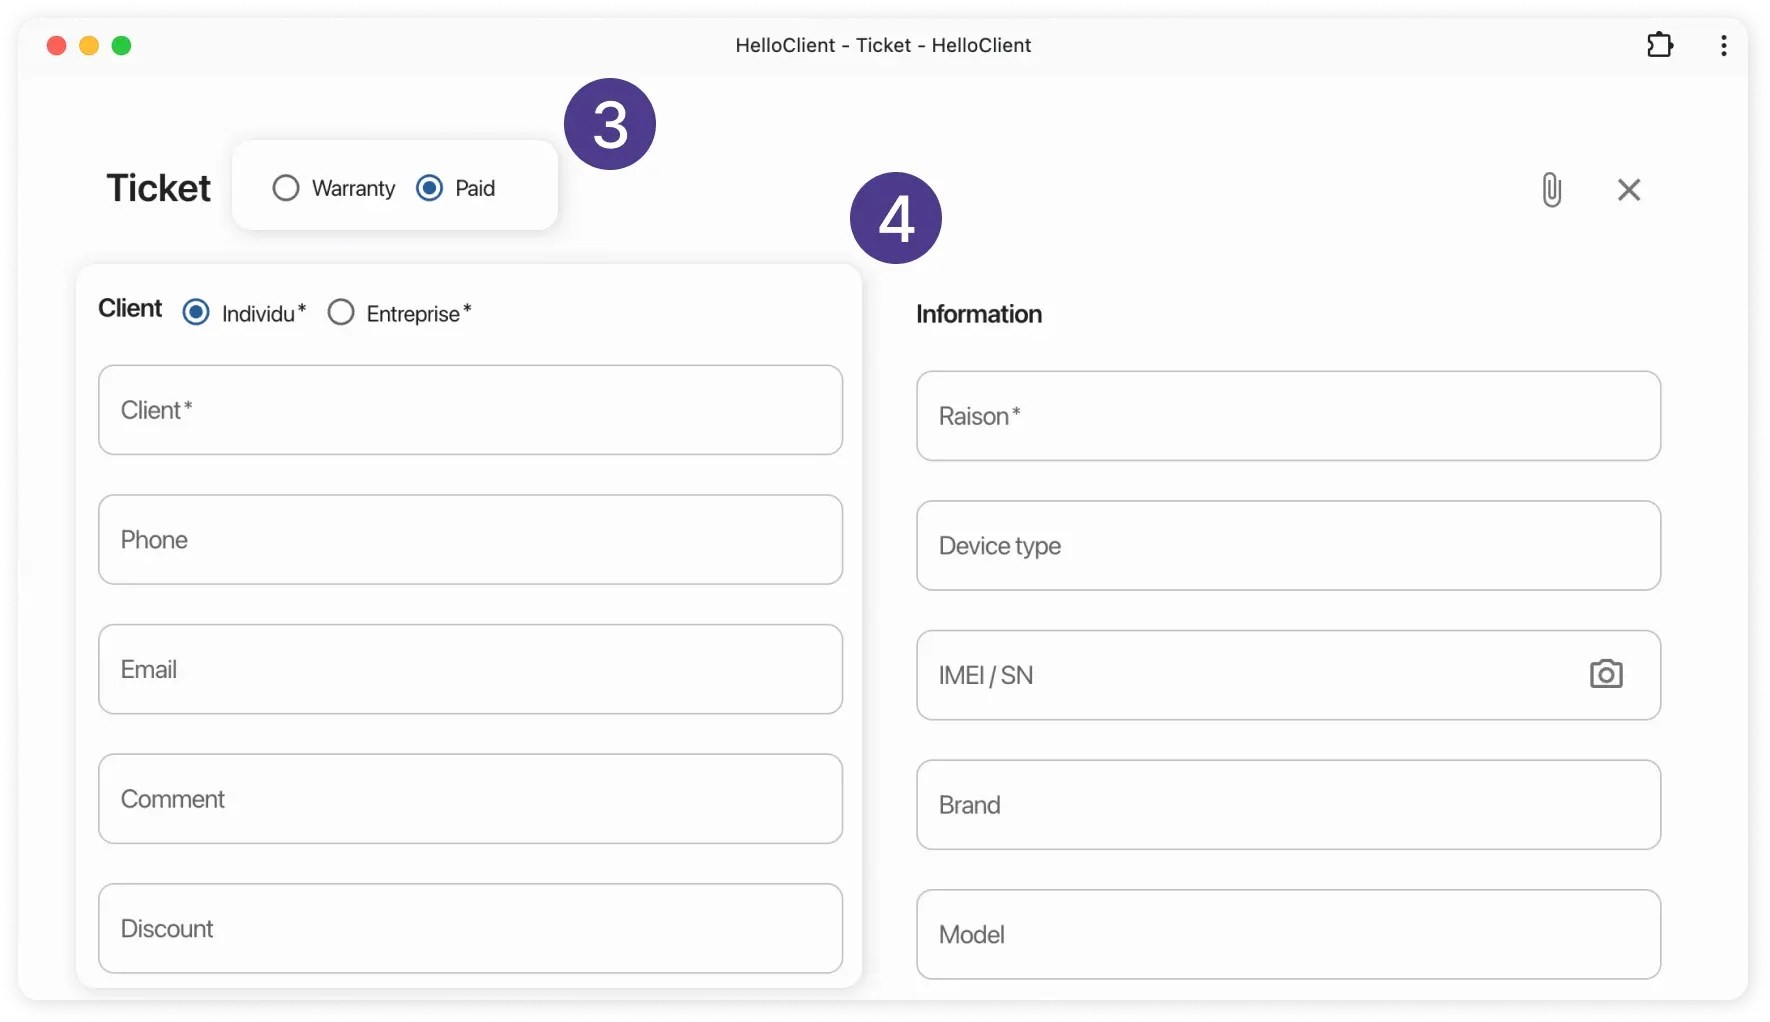
- Fill information:
- Complete required fields: “Reason for request”, “Brand”, “Model”
- To change field list: go to order field settings and drag fields to rearrange them
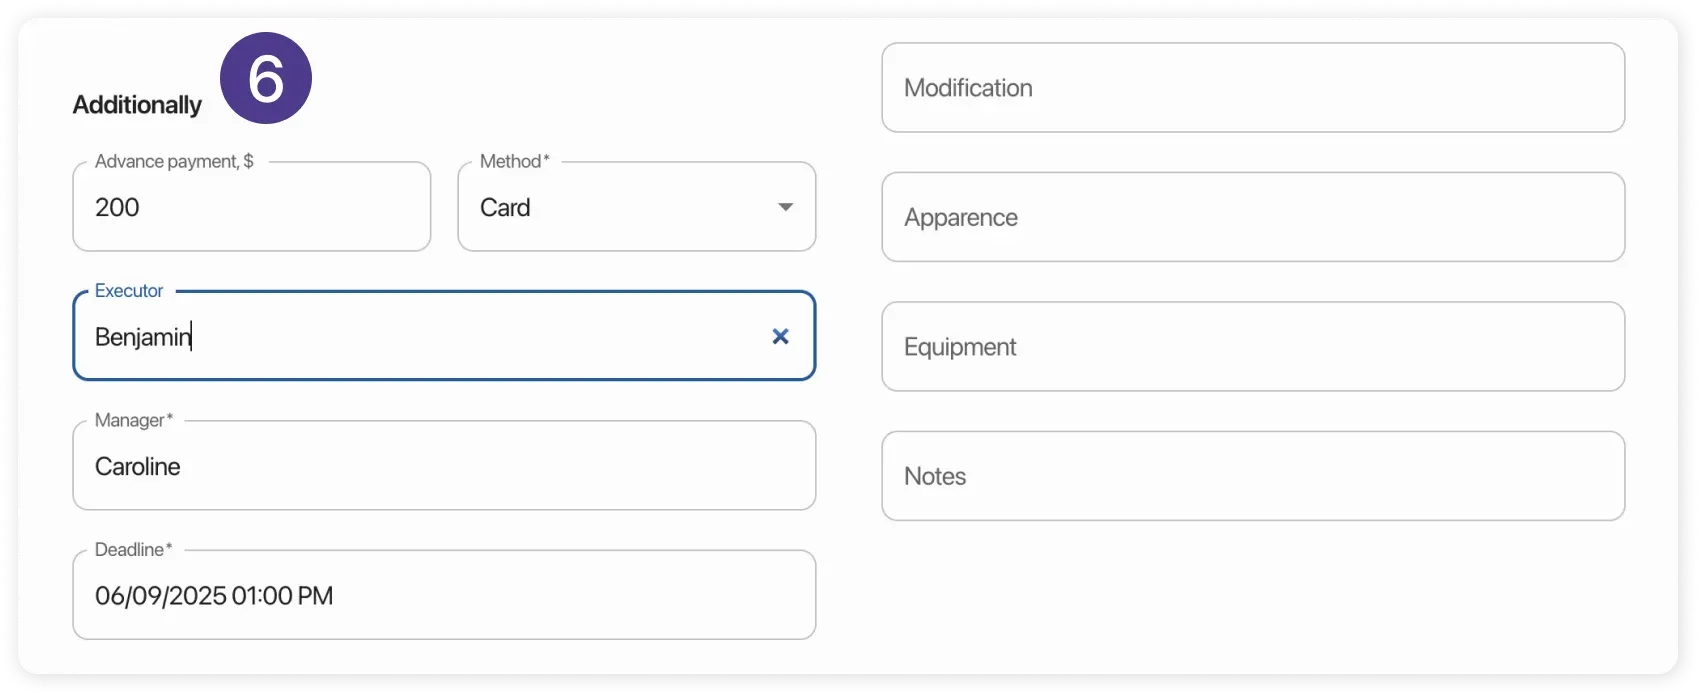
- “Additional” block:
- Prepayment: If you want to accept prepayment, fill the corresponding field. After saving, the system will automatically register prepayment in “Payments” module.
- Performer: Assign performer responsible for order completion. When assigning, the system automatically calculates salary based on employee settings.
- Manager: by default - order creator
- Files: can attach product photos
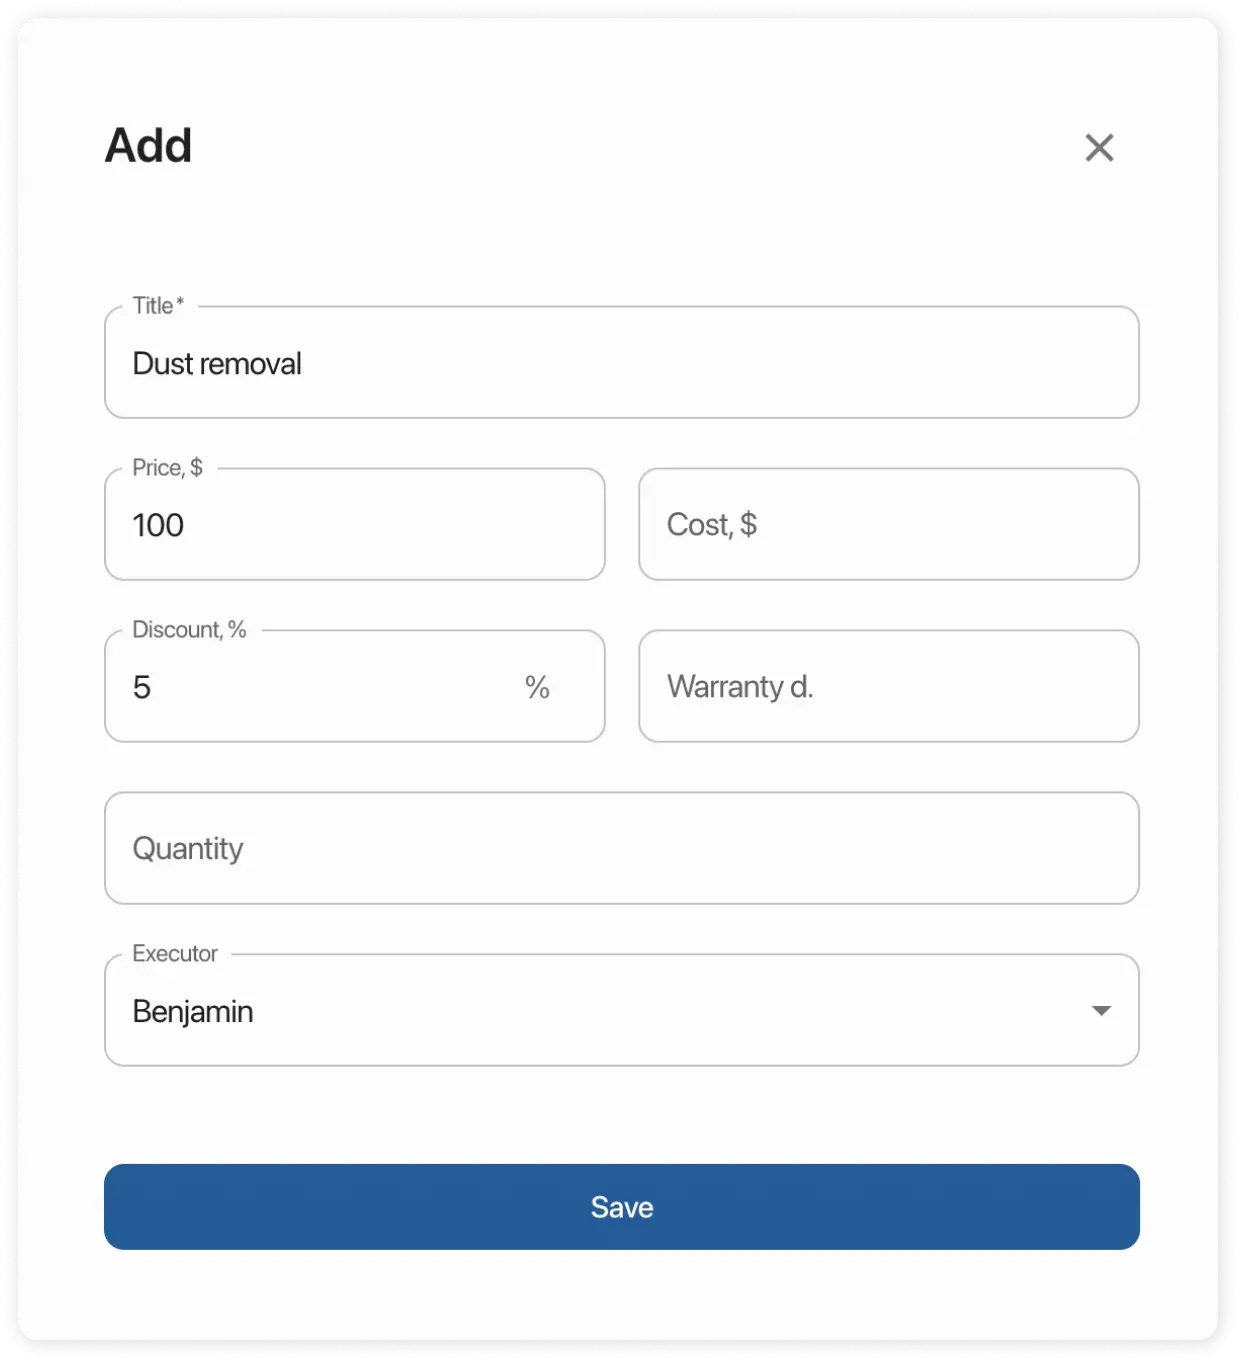
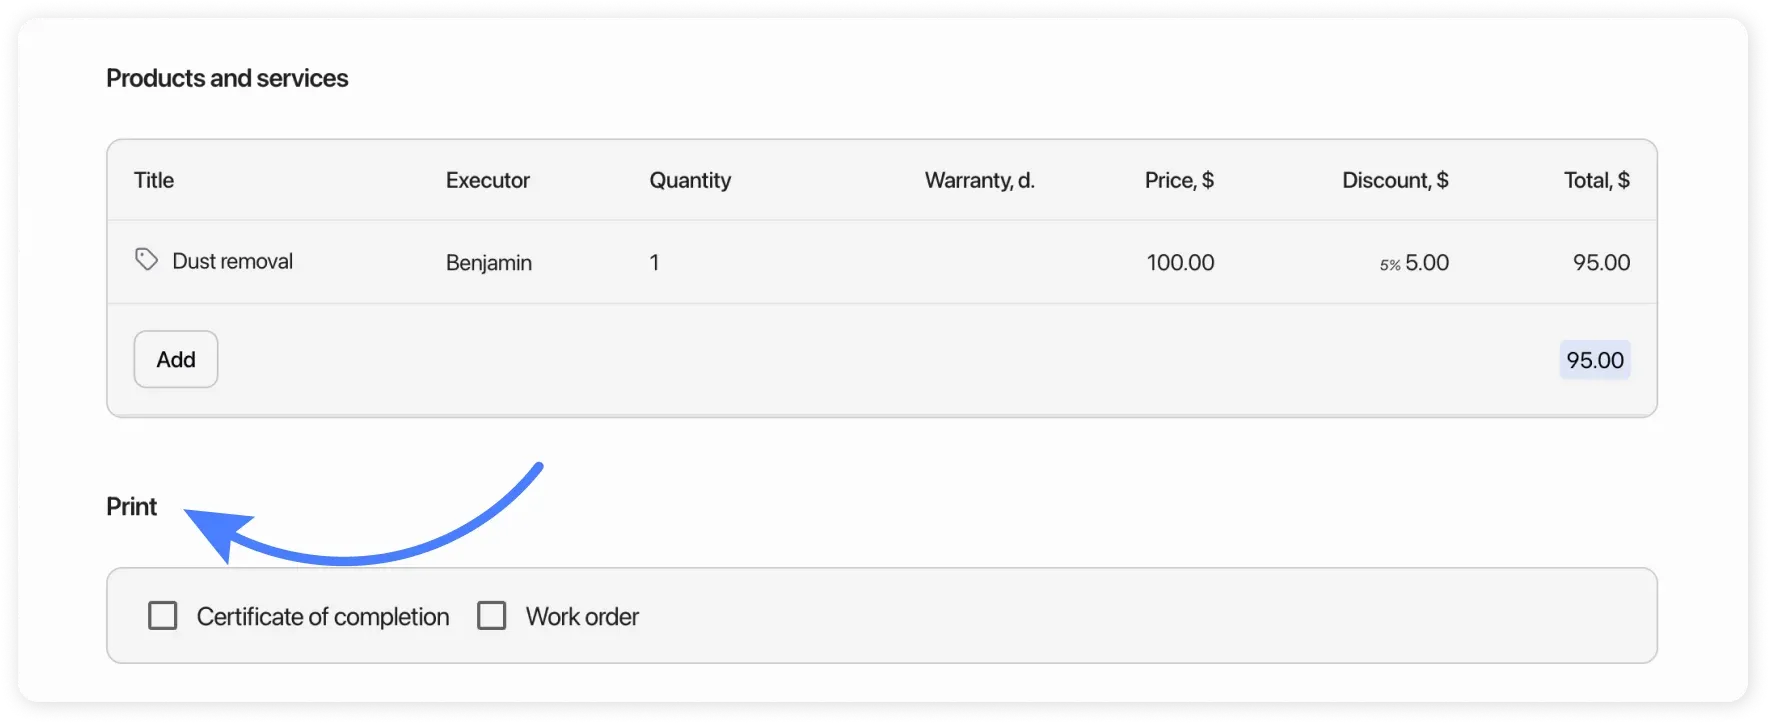
Adding Services and Parts
Section titled “Adding Services and Parts”-
In “Goods and Services” section click “Add”
-
Select items:
- Use search by name or barcode scanner
- For unique items: create one-time service/goods
-
Configure each item:
- Specify quantity
- Check inventory stock
- Apply discount
- Assign performer (for salary calculation)
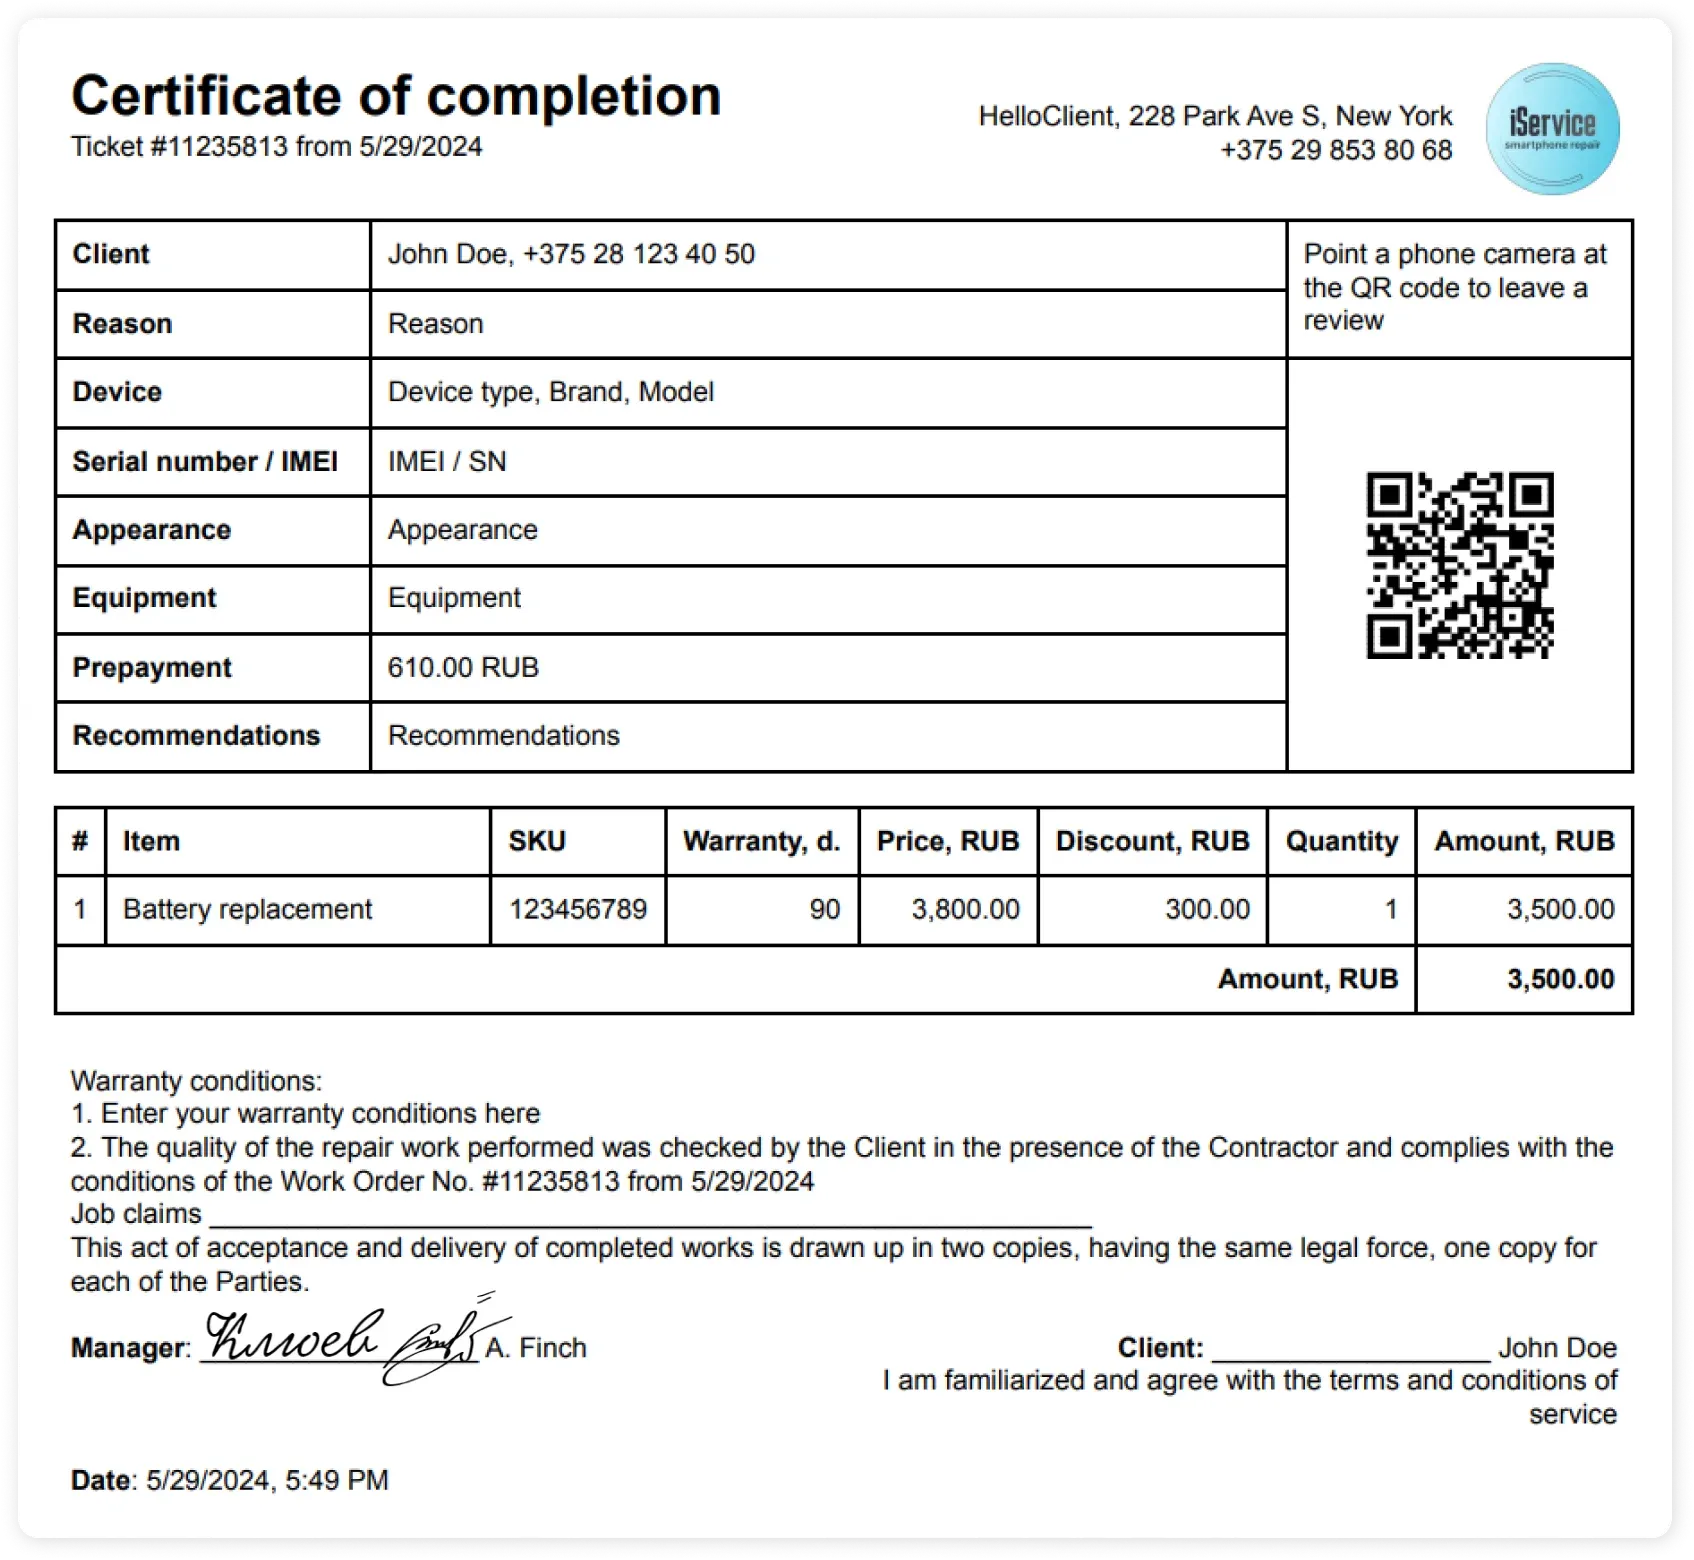
Printing Documents
Section titled “Printing Documents”In “Print” section select template:
- For example: acceptance receipt
Editing an order
Section titled “Editing an order”After saving you can change:
- Basic order data
- Performer and manager
- Prepayment and other payments
- Comments and tasks
- Goods/services list
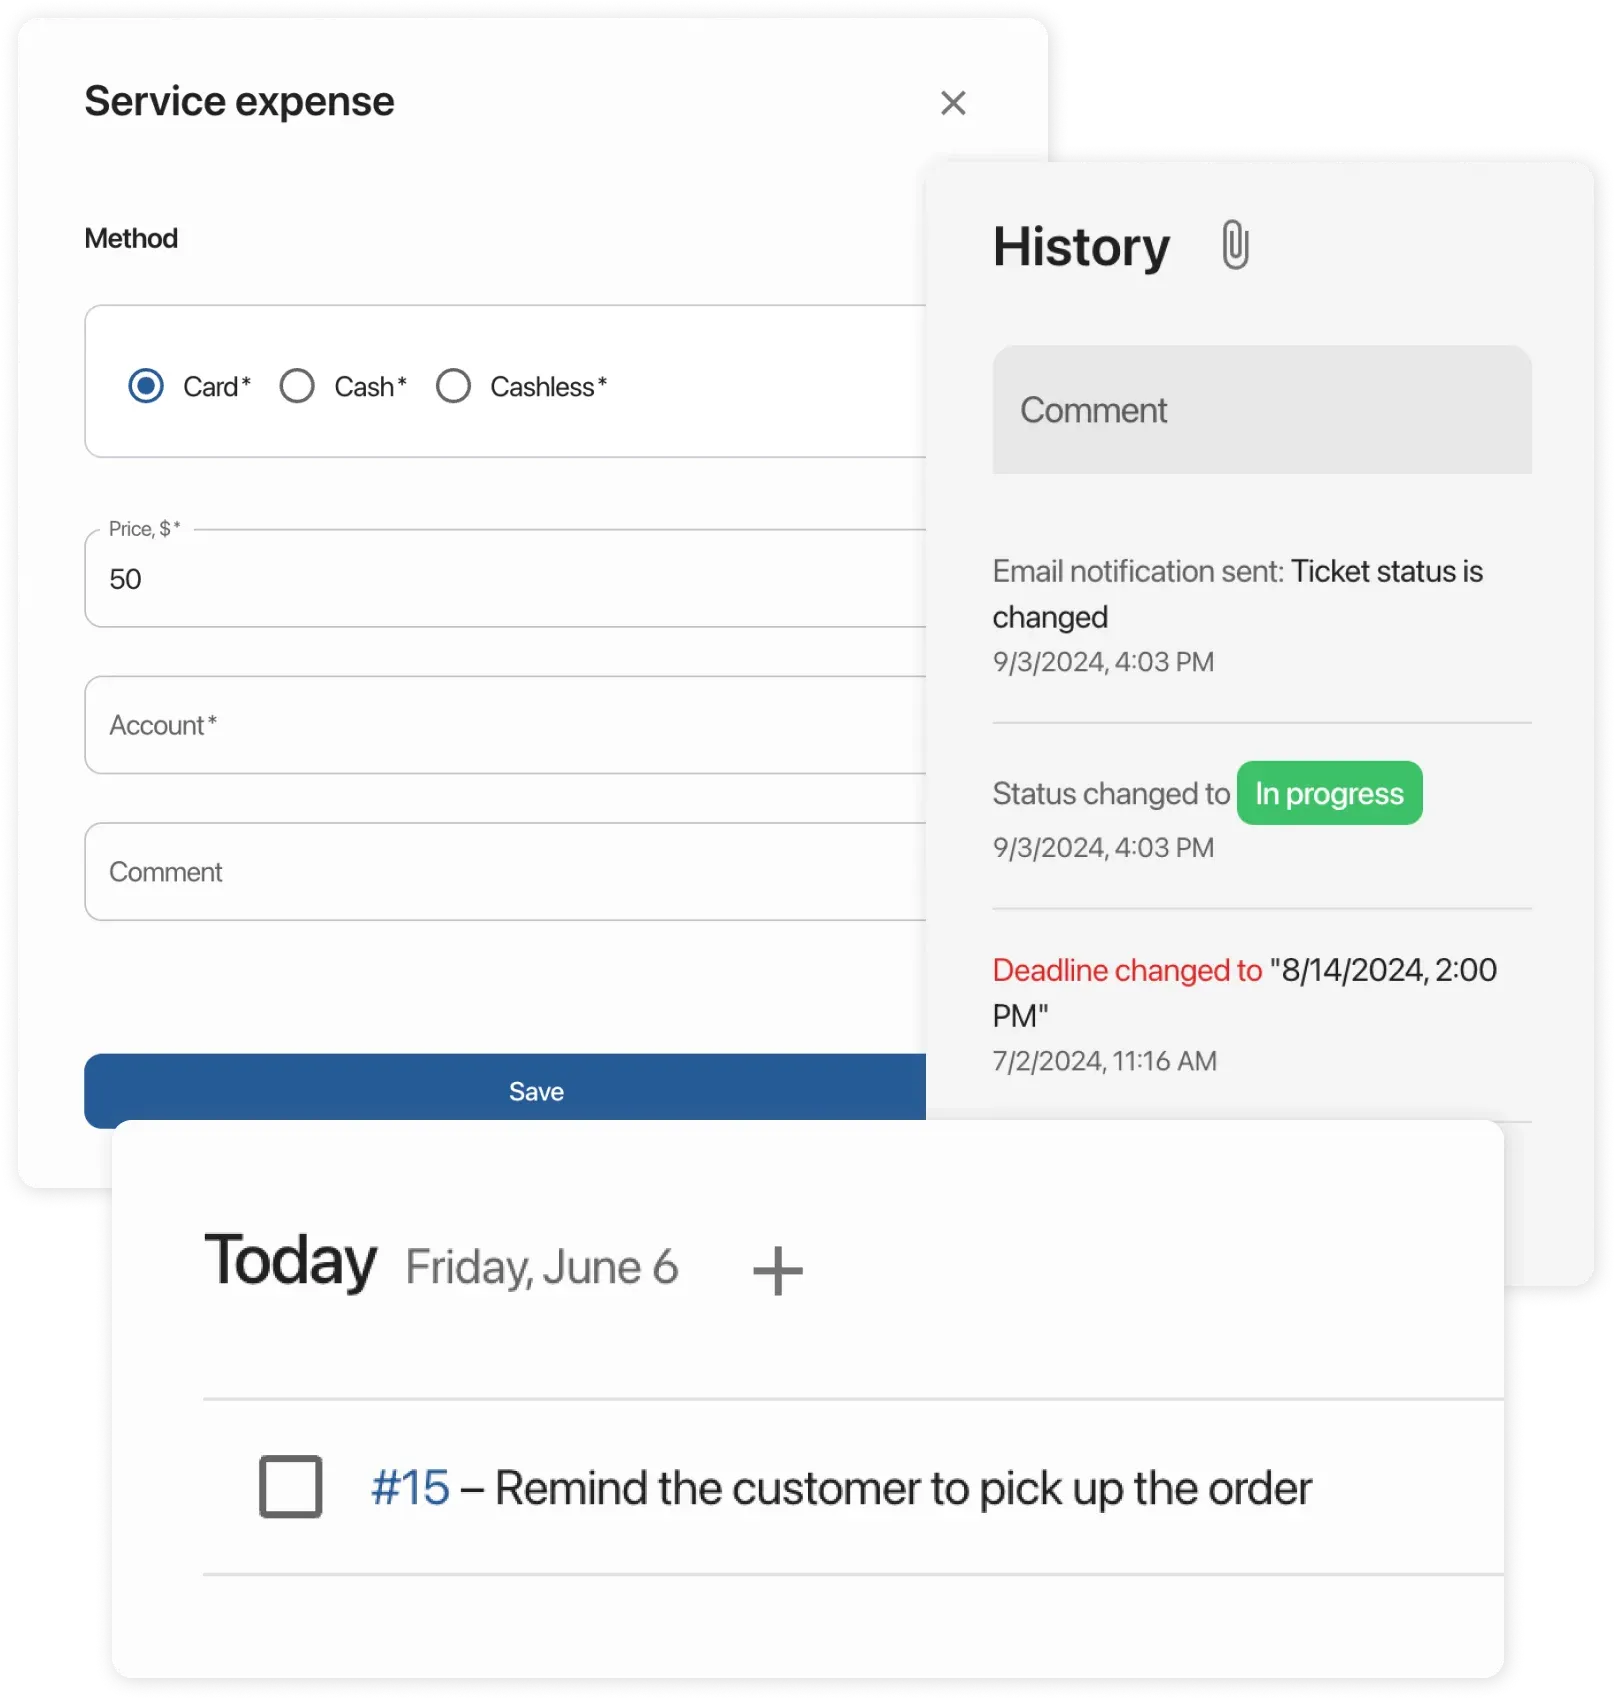
Order Statuses
Section titled “Order Statuses”-
Change status:
- In order card or table
- Status examples: “In progress”, “Pending approval”
-
Configure statuses:
- Add new: Settings → Statuses
- Modify existing ones
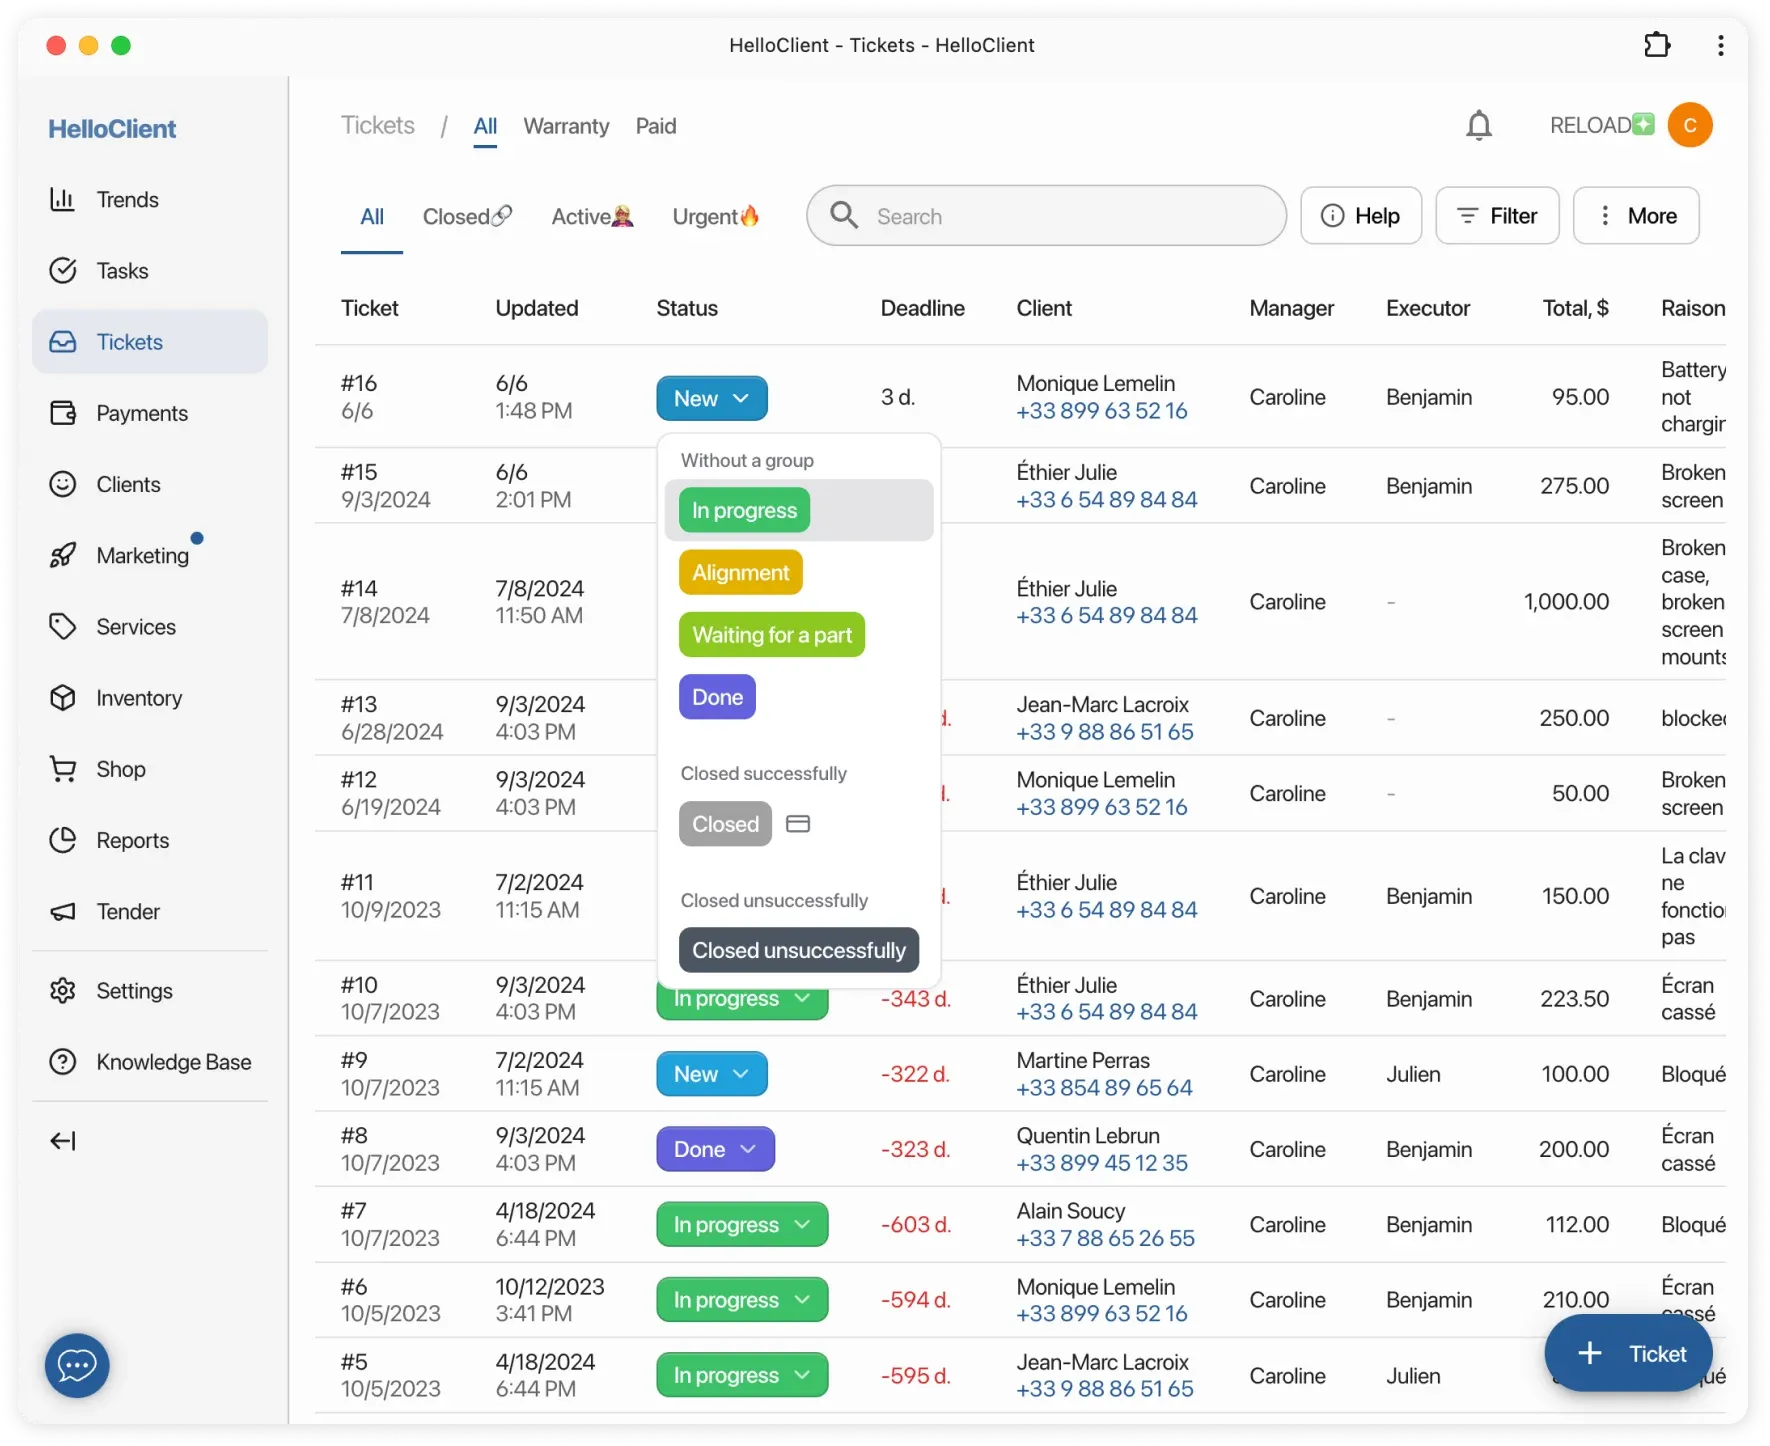
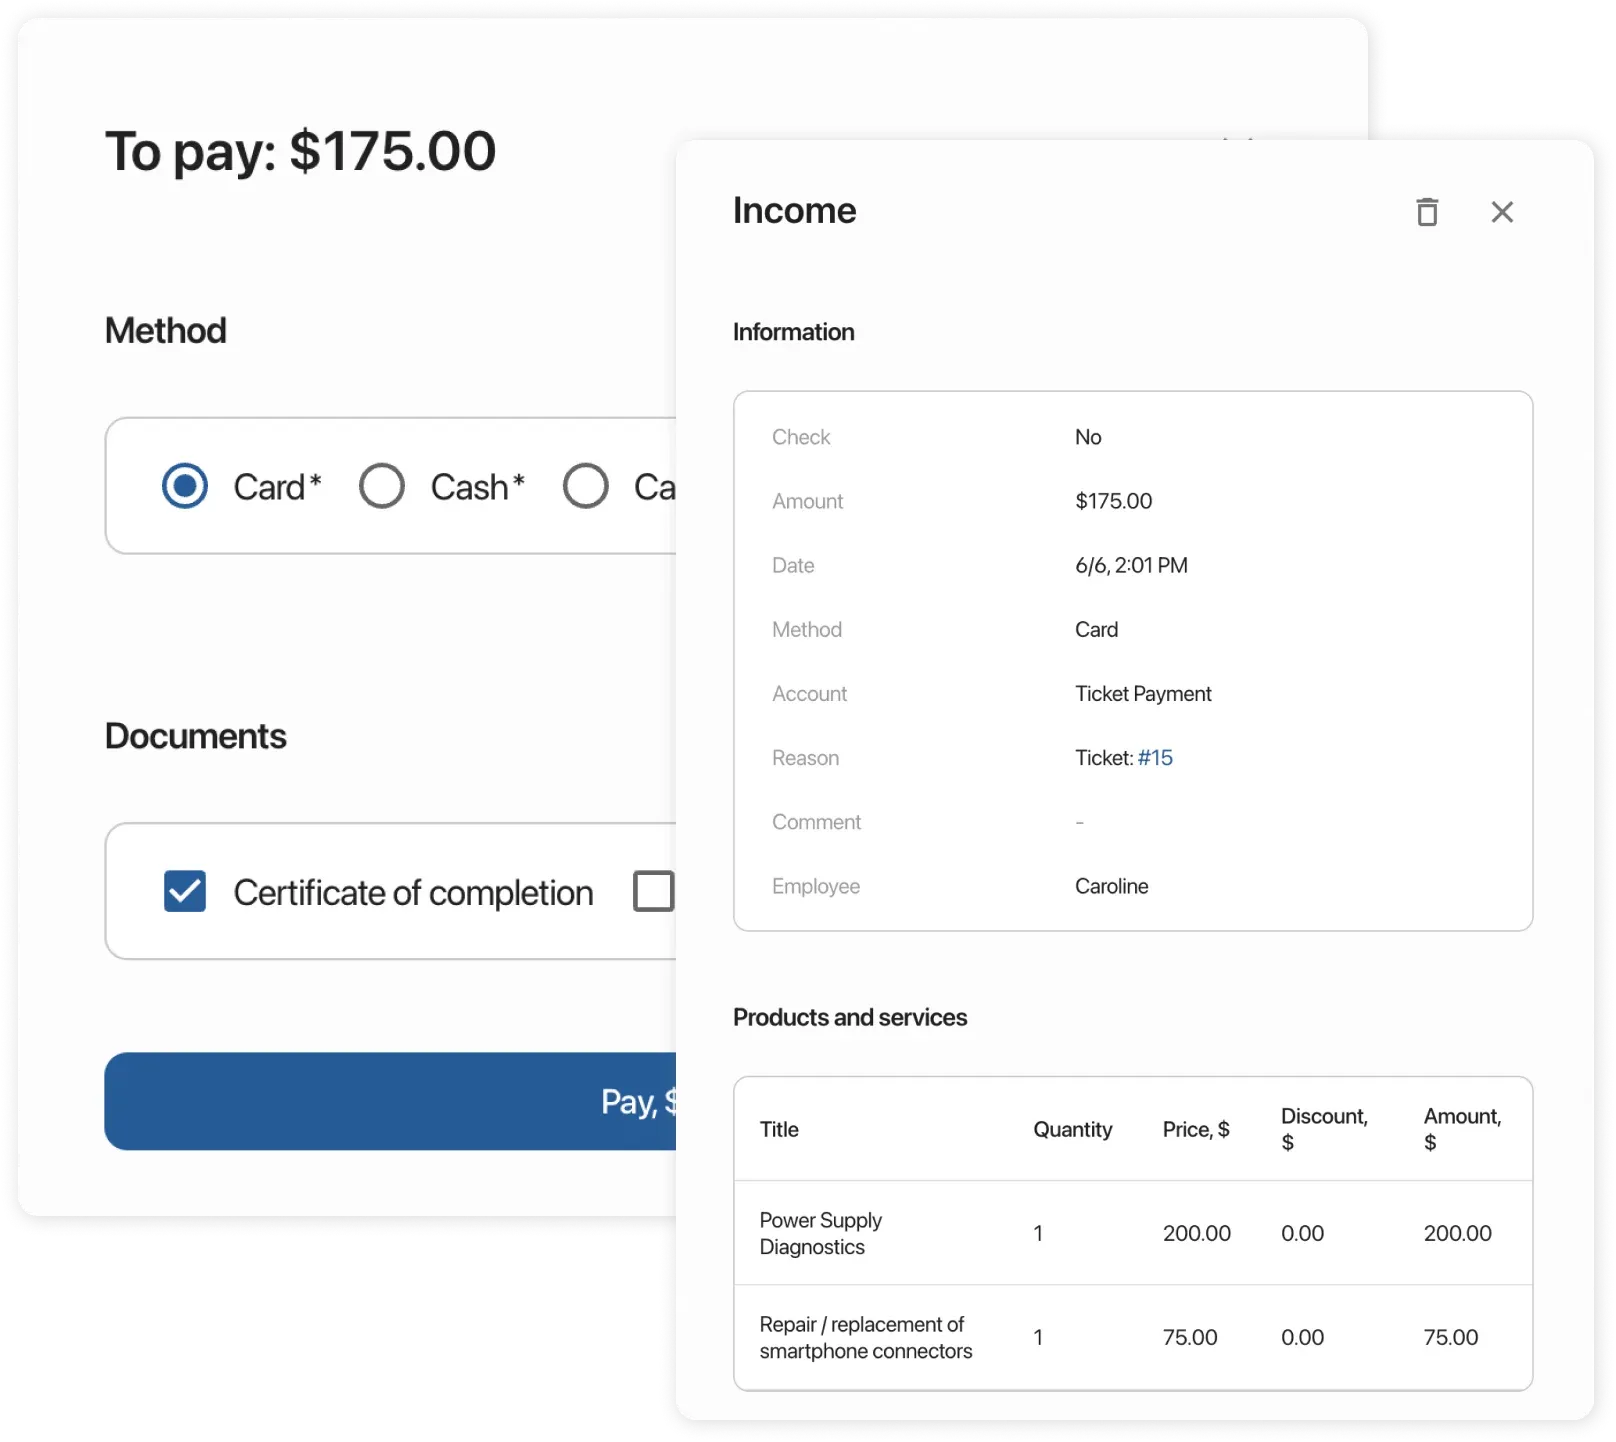
Closing an Order
Section titled “Closing an Order”-
Move order to status from “Closed successfully” group. (wallet icon)
-
Select payment method:
- System automatically accounts for prepayment
- For cash: calculates change
-
Print documents:
- Select final receipt or act
-
Check payments:
- All information available in “Payments” module